Detailing Timber for Durability

Timber's durability in service is not determined by species or treatment alone. Good detailing is necessary to ensure timber durability, allowing timber to shed water, dry out, and avoid becoming a moisture reservoir.  This page explains the design principles and construction details that protect timber from early decay, and support NCC durability compliance.
 

Publications

Durability failure most often arises from:

Problem

Cause

Timber stays wet too long

Poor ventilation, water traps, capillary zones

End-grain wicking

No sealant or flashing at cut faces

Concealed vapour buildup

No drying path or double vapour barriers

Contact with wet materials

Timber touching concrete or masonry

Principles for Durable Detailing:

  • Keep water away - design to shed rain and avoid water traps.
  • Allow drying - provide ventilation and spacing to help timber dry rapidly after wetting.
  • Protect vulnerable areas - seal end-grain, flash horizontal surfaces, and protect exposed tops.
  • Use compatible fixings - avoid corrosion staining and premature fastener failure.

Moisture-Shedding Design

Water must be diverted away from timber surfaces at every opportunity.

Technique

Description

Sloped tops

Chamfered or sloped horizontal members (e.g. beams)

Drip edges

Rebates or grooves to break surface tension

Flashings

Over end grain, at junctions, or above joinery

Overhangs

Eaves or verandahs to limit direct rain exposure

End-Grain Protection

End grain absorbs water up to 10× faster than face grain - it must always be sealed, flashed, or protected by detailing.  Best practice includes:

  • Sealing all cut ends with preservative, stain, or primer before fixing in place.
  • Re-sealing any ends exposed during construction or maintenance.
  • Using proprietary end caps on posts where exposed to weather.

Location

Required Detailing

Decking ends

Oil or wax seal; maintain 6-10 mm spacing

Exposed beam tops

Cap with flashing or membrane

Cladding base or returns

Apply end-grain sealant and incorporate drip lip

Joinery sills

Slope outward and protect with durable coating

Horizontal members such as joists and beams are also highly exposed. Protective measures include:

  • Installing damp-proof strips (bituminous DPC or proprietary joist protection tapes) on top of joists.
  • Designing for fall and drainage rather than flat surfaces.
  • Adding caps to exposed posts and balustrade tops.

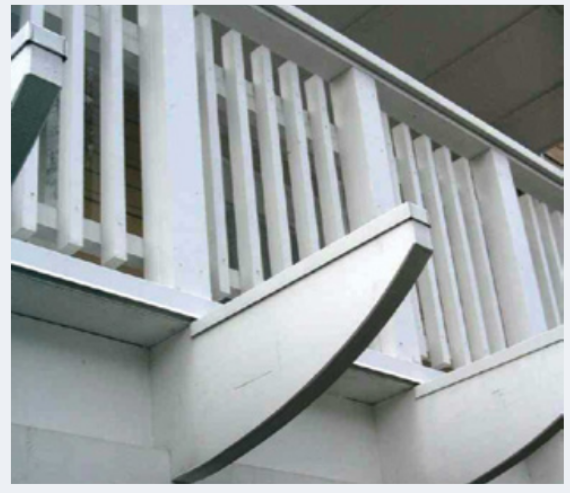
Figure 1: Capping protects top and end grain of projected beam

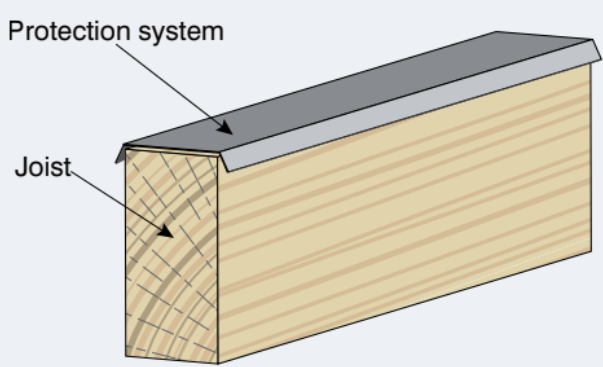
Figure 2: Diagram of timber element capping to protect against thje effects of exposure

Joint and Interface Design

Junctions between timber members are the most likely failure point. All joints must be:

  • Drained or ventilated
  • Protected from direct water flow
  • Designed for movement

Joists and Decking Details

  • Place a damp-proof flashing or protective strip along joist tops before fixing decking boards.
  • Maintain adequate spacing between decking boards for ventilation and drainage.
  • Provide sub-floor clearance and access for termite inspection where decks are close to the ground.

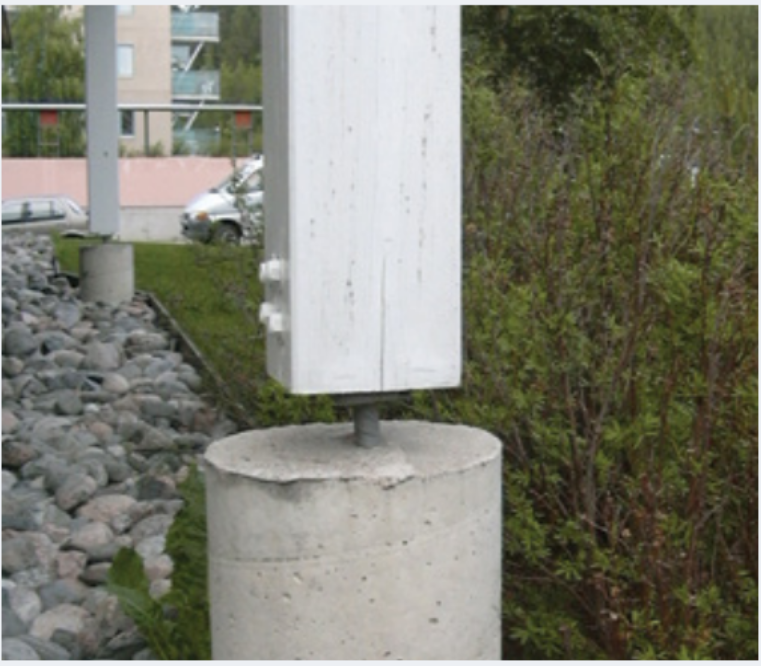
Figure 3: A well-ventilated, free-draining post support

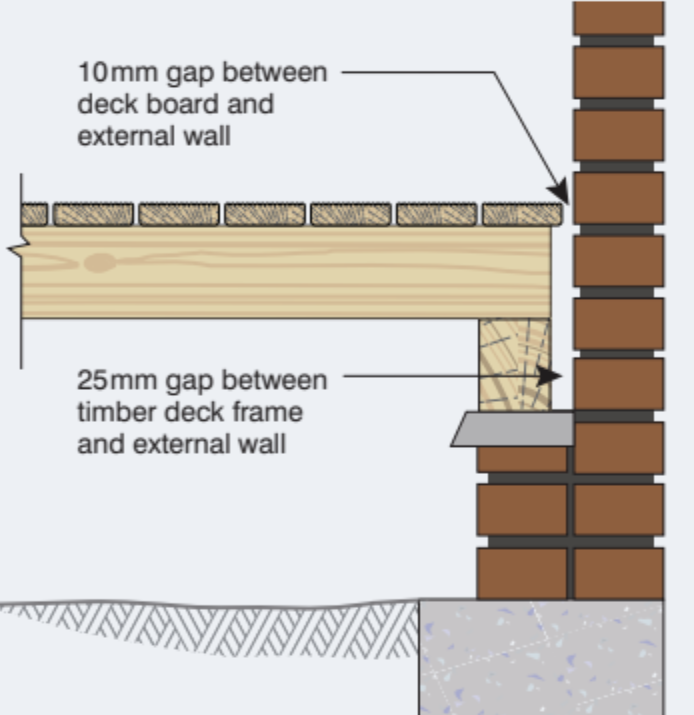
Figure 4: Gaps between decking and brickwork for ventilation and expansion

Large Section and Unseasoned Timber

For unseasoned timber in heavy construction (e.g. wharves, industrial decks):

  • Apply end sealers such as wax emulsions immediately after cutting.
  • Use end-plating (multi-toothed connectors) on sections 300 × 75 mm or larger to reduce end splitting.
  • Ensure timber is supplied with protection measures already in place.

Ventilation and Drying Cavities

Airflow is critical for drying any timber that gets wet. Common cavity detailing includes:

Element

Detailing

Behind cladding

≥20 mm cavity + ventilation gaps

Boxed eaves

Perforated soffit or vent slots

Subfloor spaces

Cross-ventilation openings to meet AS 1684

Retaining walls

Gravel + geofabric + drain pipe

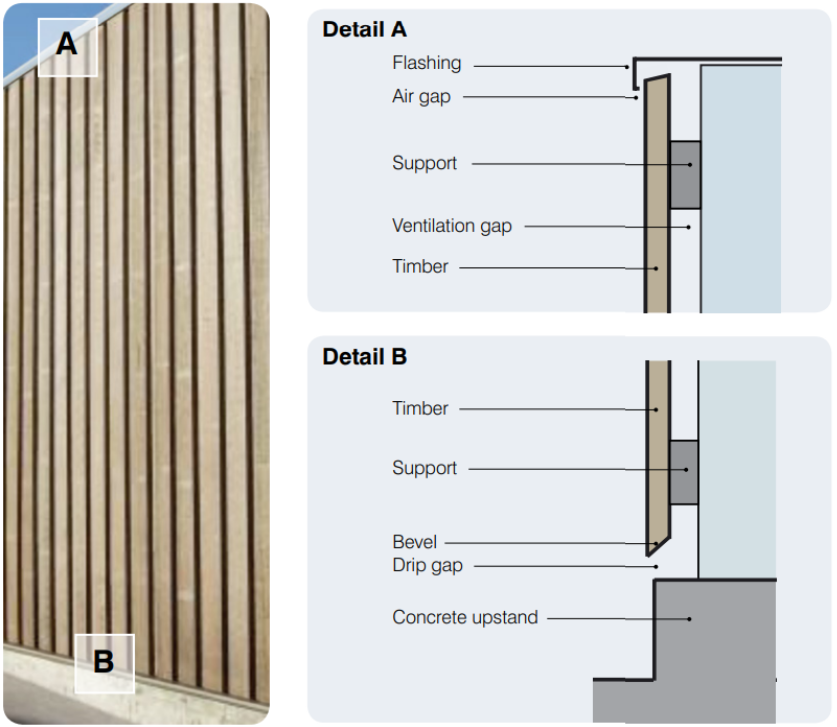
Figure 5: Gaps in a facade plane for ventilation

Separation from Moisture Sources

Durability is often compromised by small details:

  • Avoid direct ground contact wherever possible.
  • Keep cavities and joints open for drying and inspection.
  • Detail cladding, windows, and decks with flashings to shed water clear of timber.

Timber should not be in prolonged contact with moisture-retentive materials such as:

  • Concrete footings
  • Brick or render
  • Soil, bark mulch, or pavers

Key Details:

  • Use plastic shims or EPDM barriers at interfaces
  • Elevate base of posts or walls with stainless base plates
  • Include weep holes or flashings to promote drying

Design for Inspection and Maintenance

Durability depends on what you can inspect, maintain, and replace. Key strategies:

  • Make high-risk areas visible (e.g. cladding base, post bases)
  • Use removable components (e.g. slats, battens)
  • Avoid sealed, inaccessible cavities
  • Document sealant systems and coating cycles

Summary Points

  • Good detailing can make even low-durability timber last decades
  • Prioritise water shedding, ventilation, and end grain protection
  • Detail every interface - particularly horizontal joints, beam tops, and wall bases
  • Provide separation from masonry, concrete, and ground moisture
  • Ensure timber remains visible and maintainable throughout its service life
  • Reference the moisture guide for additional construction-phase detailing